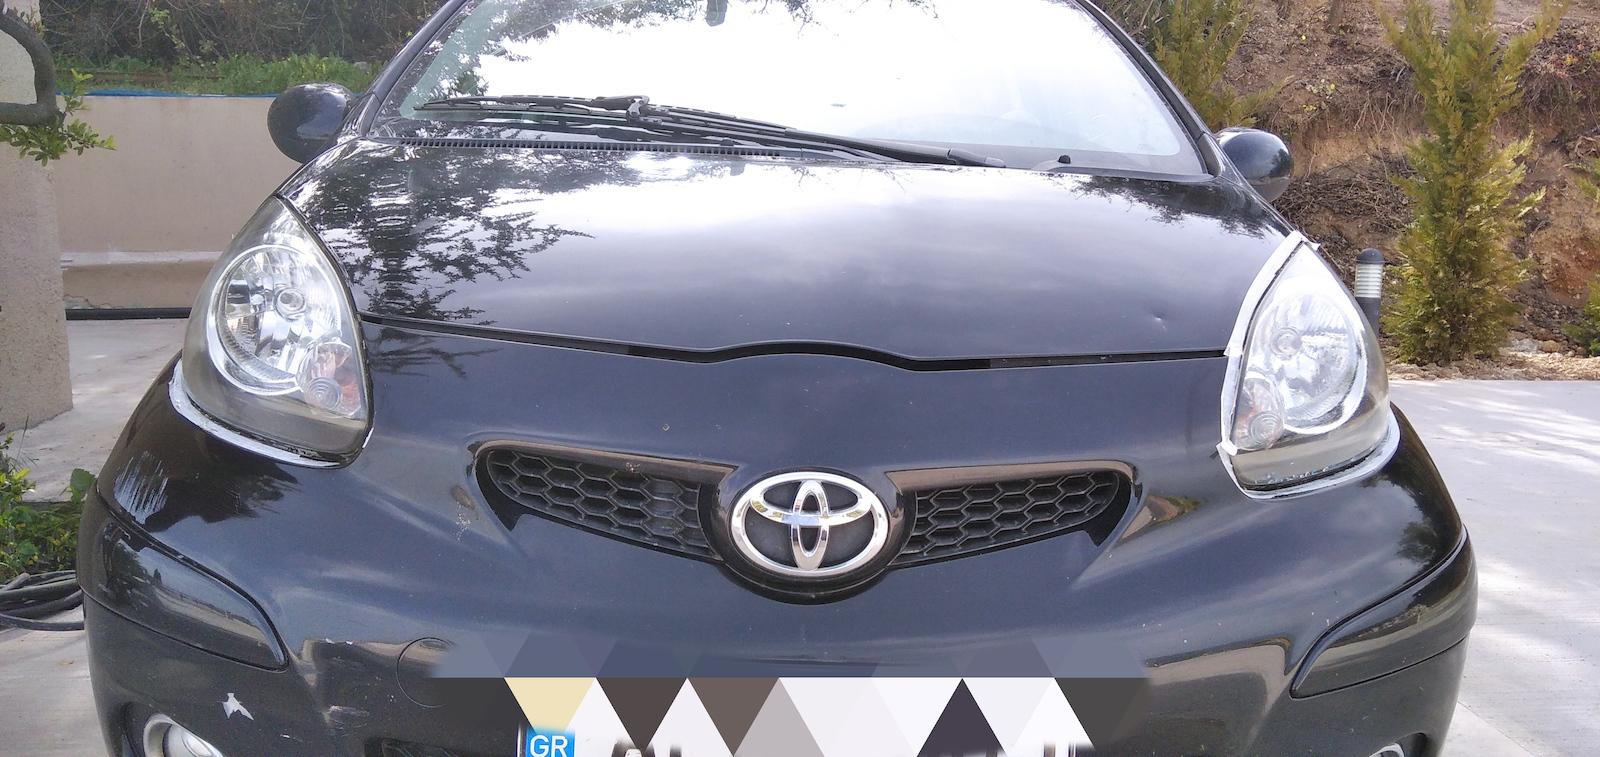
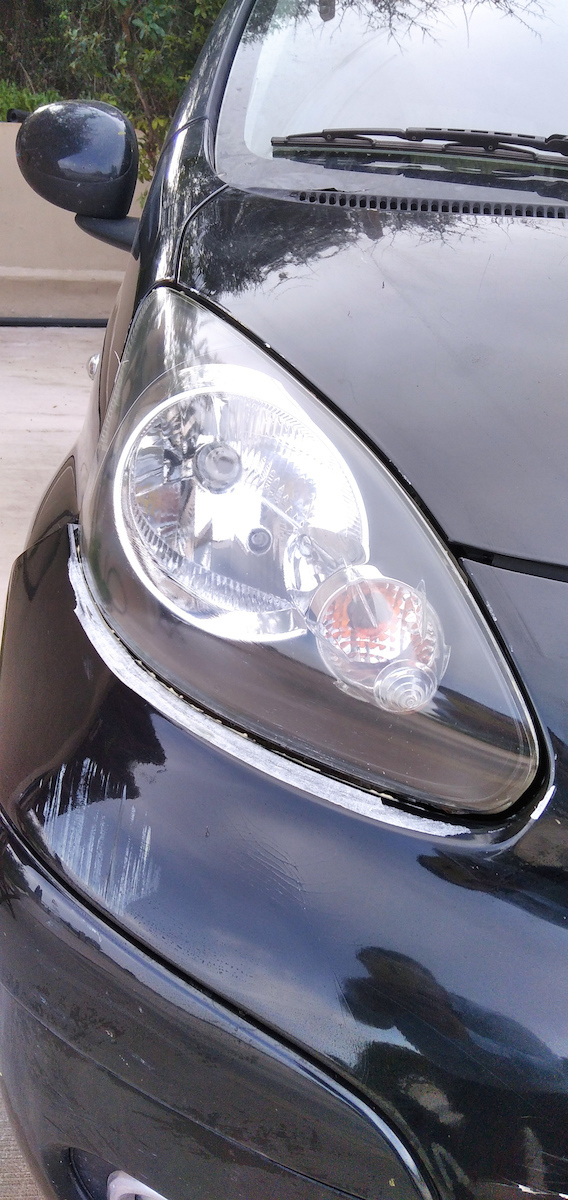
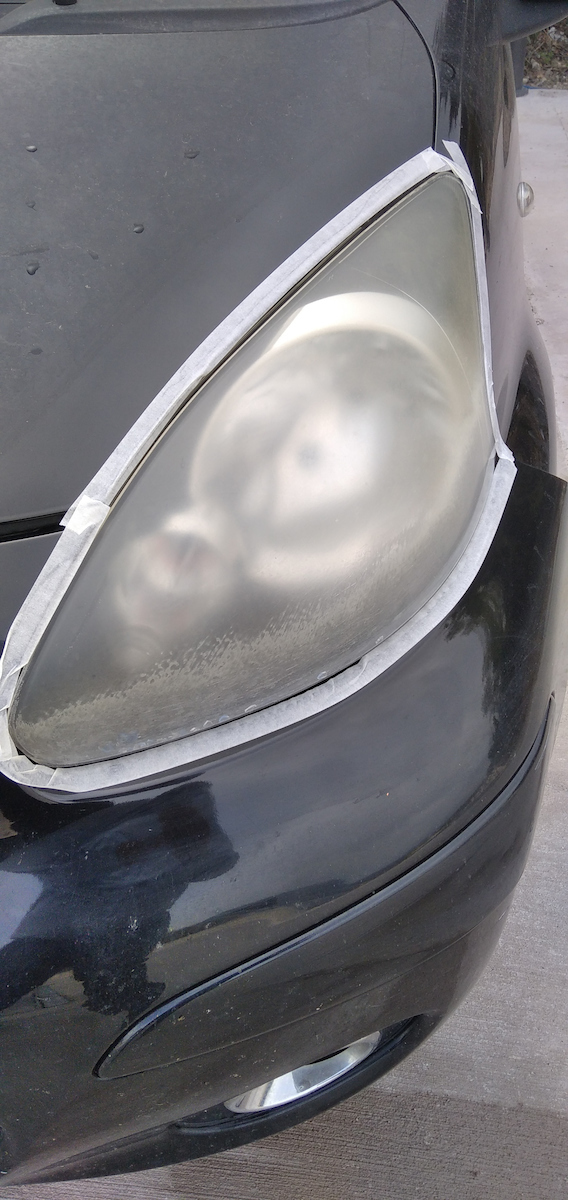
Today I applied it and here is the result (see photo)!!! I didn't expect to see such a big difference in the brightness of the headlight!!! Easy process even for beginners. The only thing you will need for better results and less effort is a drill. I highly recommend it!
I will provide you with detailed instructions because the ones in the box are in English for those who don't understand.
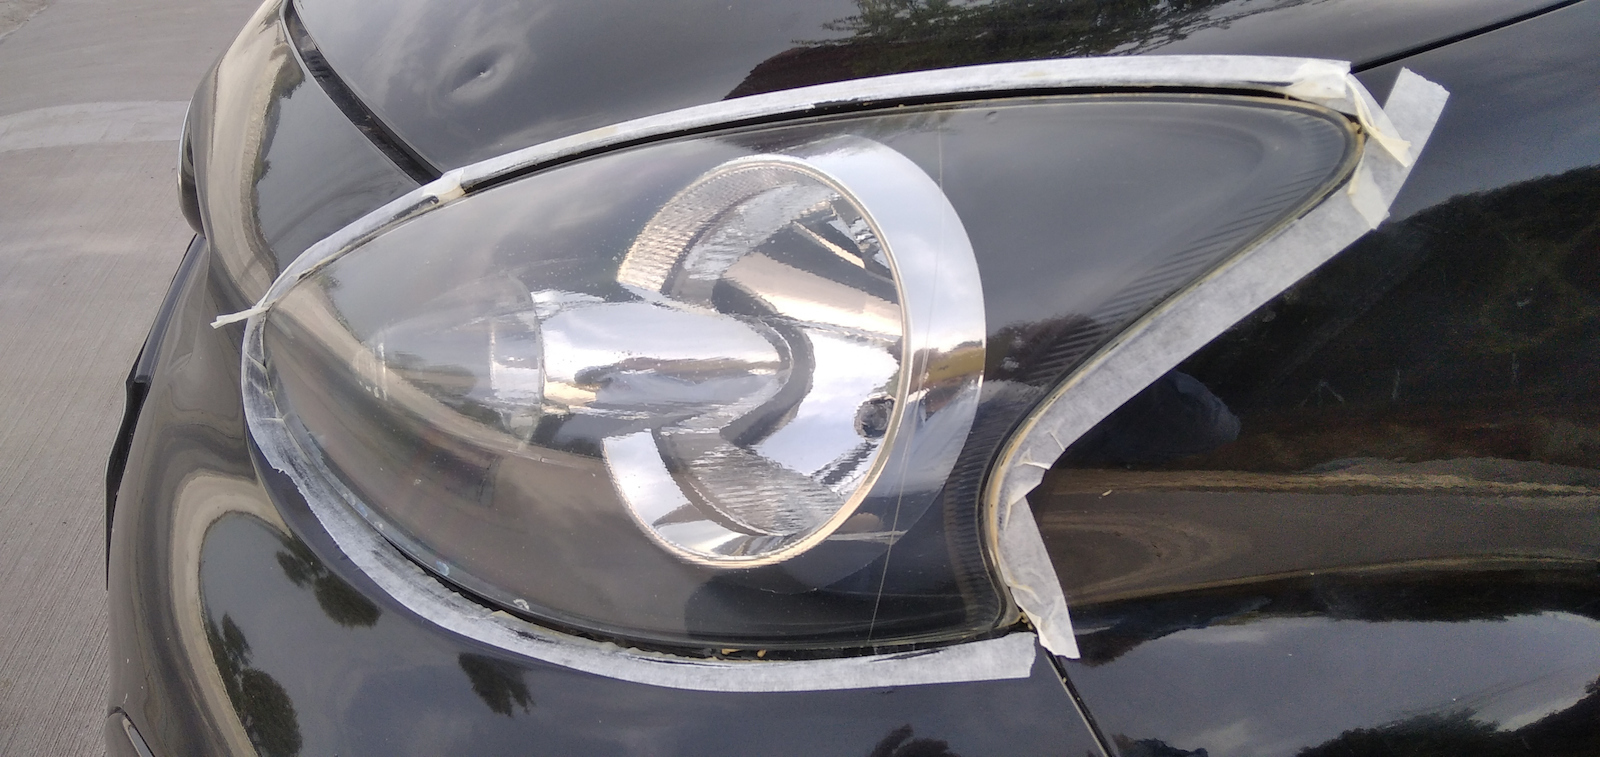
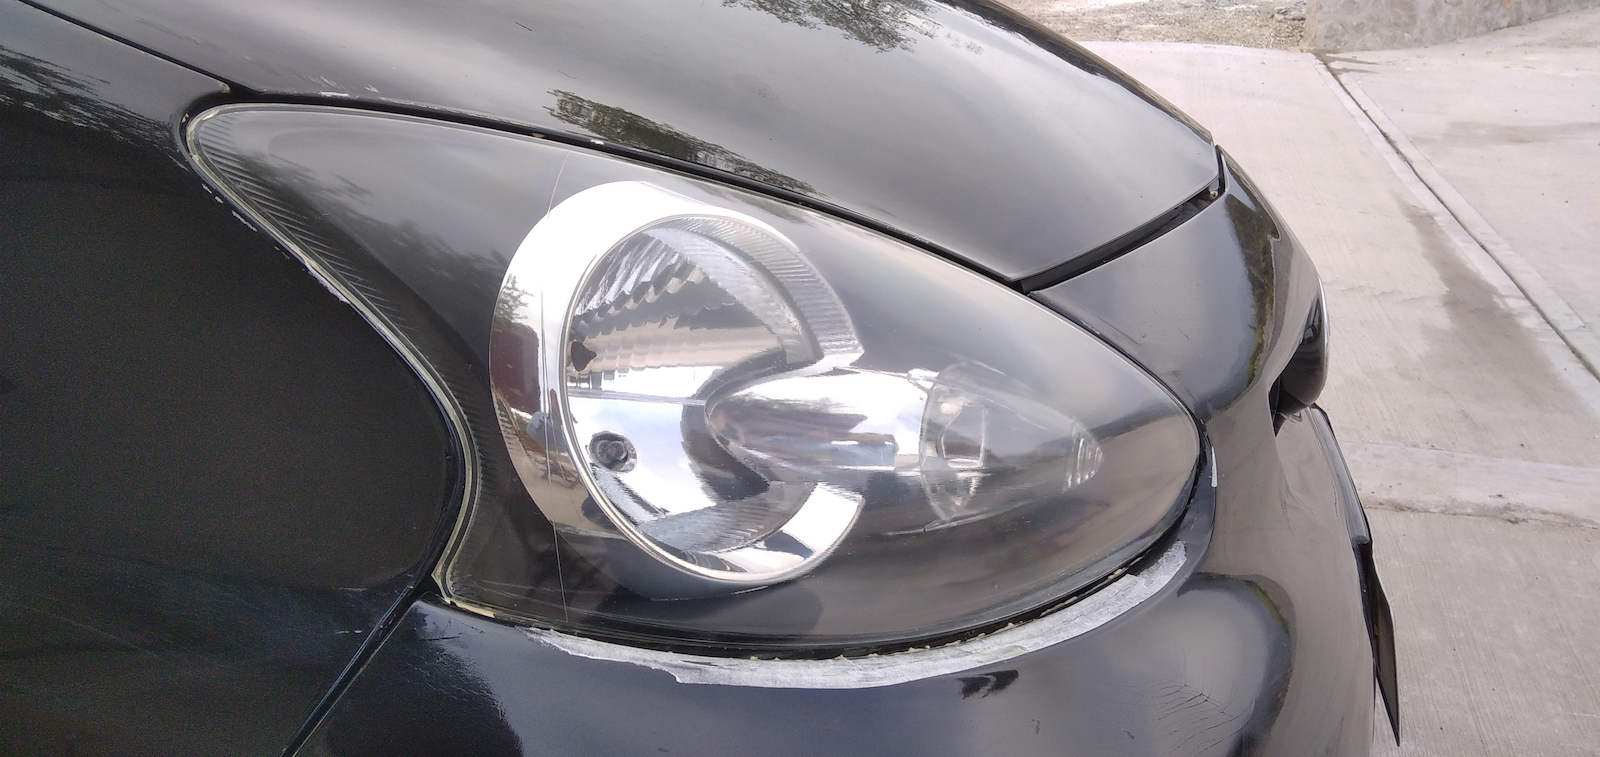
INSTRUCTIONS STEP 1: APPLY TAPE AROUND EACH HEADLIGHT (included), wet the sandpaper (included) and start rubbing starting from the coarsest one, which is P800. Wipe with a damp microfiber cloth and continue with the same process for the other two numbers, which are P1200 and P2000. Finally, rinse and dry with paper towels.
STEP 2: Apply the paste (with the orange sponge included) on the entire headlight and leave it for 15-20 minutes. Then attach the adapter to the tool you have and slowly rub the paste until the headlight starts to clear up (not exceeding 200 rotations per minute). When the paste is gone and the headlight is clear, rinse it again with a clean microfiber cloth and dry it with kitchen paper towels.
STEP 3: Take a clean microfiber cloth or a new sponge (the one included is too small and not convenient) and apply the varnish with even strokes to cover the entire headlight. Be careful! Don't "dab" it, but spread it evenly, otherwise it will create bubbles and we won't achieve the desired result. Finally, leave it for 1-2 hours (depending on the humidity of the environment) and then take the car out in the sun to let the varnish harden. CAUTION! WASH THE CAR AFTER 24 HOURS OF APPLICATION!
Σήμερα το εφάρμοσα και ιδού το αποτέλεσμα (βλ. φώτο)!!! Δεν περίμενα να δω τόσο μεγάλη διαφορά σε βαθμό καινούριου Φαναρίου!!!! Εύκολη διαδικασία αν και αρχάριος. Το μόνο που θα χρειαστείτε για καλύτερο αποτέλεσμα και λιγότερο κόπο είναι ένα δραπανοκατσαβιδο. Το συνιστώ ανεπιφύλακτα!
Σας γράφω αναλυτικά τις οδηγίες γιατί μέσα στο κουτί είναι στα αγγλικά για όσους δεν γνωρίζουν.
ΟΔΗΓΊΕΣ ΒΉΜΑ 1 ΤΟΠΟΘΕΤΟΎΜΕ ΧΑΡΤΟΤΑΙΝΙΑ ΓΎΡΩ ΑΠΌ ΚΆΘΕ ΦΑΝΆΡΙ (εμπεριέχεται) βρέχουμε τα γυαλοχαρτα (εμπεριέχονται) και τρίβουμε ξεκινοντας από το ποιο χοντρό δλδ το P800 σκουπίζουμε με βρεγμένο πανακι μικροινον και συνεχίζουμε με την ίδια διαδικασία με τα άλλα δύο νούμερα δλδ Ρ1200 & Ρ2000 τέλος ξεπλένουμε και στεγνονουμε με χαρτί βήμα 2 Εφαρμόζουμε την πάστα (με το πορτοκαλι Σφουγγαράκι (εμπεριέχεται) σε όλο το φανάρι και αφήνουμε για 15-20 λεπτά. Ύστερα τοποθετούμε τον ανταπτορα στο εργαλείο που διαθέτουμε και τρίβουμε την πάστα αργά μέχρι να αρχίσει να ξεθαμπονει το φανάρι (όχι πάνω από 200 στροφές/λεπτό) Όταν φύγει η πάστα και τό φανάρι είναι διαυγές πλέων τότε το ξεβγαζουμε πάλι με ένα καθαρό πανί από μικροινες βρεγμένο και το στεγνονουμε με χαρτί κουζίνας. Βήμα 3ο περνούμε ένα καθαρό πανί από μικροινες η ένα σφουγγάρι καινούριο (αυτό που εμπεριέχει είναι πολύ μικρό και δεν βολεύει) και ρίχνουμε το βερνίκι με ομοιόμορφες κινήσεις να πάει παντού στο φανάρι. Προσοχή! Δεν "ταμποναρουμε" αλλά στρώνουμε γιατί αλλιώς θα κάνει φουσκαλιτσες και δεν θα έχουμε το αποτέλεσμα που θα θέλαμε. Τέλος αφήνει για 1-2 ώρες (ανάλογα την υγρασία του περιβάλλοντος) και ύστερα βγάζουμε το αυτοκίνητο στον ήλιο για να σκληρύνει το βερνίκι. ΠΡΟΣΟΧΉ! ΠΛΈΝΟΥΜΕ ΤΟ ΑΥΤΟΚΊΝΗΤΟ ΎΣΤΕΡΑ ΑΠΌ 24ΩΡΕΣ ΜΕΤΆ ΤΗΝ ΕΦΑΡΜΟΓΉ!